
Introduction
You don’t need a supercomputer to do serious weather work anymore. You need a clean Python environment, a sane data source, and enough patience to download a few gigabytes without your Wi-Fi deciding it’s performance art.
This guide is the fastest path I know to go from “I’ve heard of NVIDIA Earth 2” to “I just ran a global forecast on my own machine.” It’s practical, a little opinionated, and built for people who want results before lunch. Quick clarity up front, this is not the Earth 2 crypto game. This is Earth 2 as in open weather and climate tooling.
1. NVIDIA Earth 2 In One Minute
Here’s the promise of NVIDIA Earth 2 in plain terms, it turns weather forecasting from a weeks-long infrastructure project into a weekend experiment. In this tutorial, you’ll do two things: set up Earth2Studio cleanly, and run your first FourCastNet 3 forecast with the FCN3 model.
Table 1, What You’ll Do, What You’ll Get
NVIDIA Earth 2 Milestones
| Milestone | What You Do | What You Get | Why It Matters |
|---|---|---|---|
| Environment | Create a fresh project and pin Python | Reproducible setup you can rerun later | Fewer “works on my machine” tragedies |
| Install | Install Earth2Studio with FCN3 and data extras | Model and data plumbing in one place | Avoids missing-import rabbit holes |
| Run | Execute a 3-day forecast script | Real forecast tensors on a global grid | You can start evaluating, plotting, iterating |
If you’ve ever tried to reproduce a weather ML repo and ended up with a stack trace longer than the atmosphere, this is the antidote. NVIDIA Earth 2 isn’t magic. It’s something better: a disciplined packaging of models, data access, and IO so you can focus on experiments instead of dependency whack-a-mole.
Table of Contents
2. What You Are Installing
NVIDIA Earth 2 is a family name, not a single binary you double-click. Think of it as an open stack that includes:
- Models: forecasting, nowcasting, downscaling, and more.
- Tools: an ecosystem that wires models to data and outputs.
- Workflows: practical pipelines you can run locally or in production.
The part you’ll touch directly is Earth2Studio, which is the “glue” layer.
Zoom out for a second and the bigger picture gets interesting. The wider Earth-2 lineup spans medium-range global forecasting, storm-scale nowcasting, generative downscaling, and fast data assimilation. The point isn’t that one model wins every benchmark, it’s that the stack covers the whole loop from ingesting observations to producing forecasts you can actually use.
In day-to-day practice, code tends to live on GitHub, while model checkpoints often live on Hugging Face. You wire them together through Earth2Studio, which gives you the consistent entry points you want when you’re moving between models.
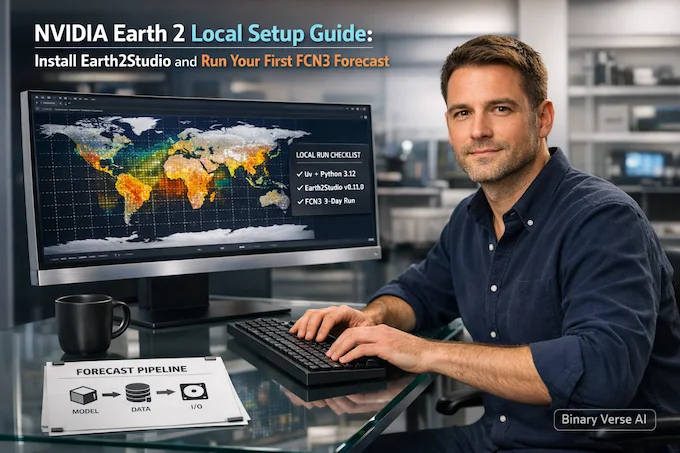
If you like mental models, here’s the minimum one that actually helps:
Model + Data Source + IO Backend = Forecast Pipeline
In this guide, the model is FCN3 (FourCastNet 3), the data source is GFS, and the IO backend is a Zarr container. That triad is the core pattern you’ll reuse for everything else in NVIDIA Earth 2 Studio.
Where do models live? In practice, you’ll see two places in the ecosystem: repositories for code and packaging, and model hubs for weights. The quick-start workflow tends to point you at a repo, pull a tagged version, and then fetch weights as needed. That’s why people search for NVIDIA Earth 2 GitHub when they want to get moving.
3. Hardware Requirements And Realistic Performance Tiers

Let’s make this honest. NVIDIA Earth 2 runs on CPU, but you’ll feel it in your bones. A GPU makes the experience go from “I hope my laptop survives” to “oh, that’s actually fast.”
You don’t need the exact demo GPU, but it helps to anchor expectations. The demo environment uses an NVIDIA RTX 6000 with 48GB VRAM. That’s a luxury tier, not a requirement. What matters is VRAM and bandwidth more than raw compute bragging rights.
Table 2, Practical Hardware Tiers For This Tutorial
NVIDIA Earth 2 Hardware Tiers
| Tier | What You Likely Have | Works? | What It Feels Like |
|---|---|---|---|
| Minimum | CPU only | Yes | Slow, still useful for verifying the pipeline |
| Comfortable | Any modern NVIDIA GPU | Yes | Reasonable runtimes for a 3-day run |
| Smooth | High-VRAM workstation GPU | Yes, and happier | Lets you push bigger workloads without constant tuning |
Storage wise, plan roughly 5–10GB for weights plus GFS data. Bandwidth matters, too. Your first run has a “download tax,” and then things calm down.
Here’s the reader promise, because hidden scaling surprises are the fastest way to lose trust: memory use grows with grid size, number of steps, and ensemble size. If you crank those knobs, your machine will tell you the truth.
4. Preflight Checklist Before Installation
Before you type commands, do the two-minute sanity check that saves two hours.
- OS: Linux is the clean path. Windows is fine if you run through WSL2.
- NVIDIA stack: if you’re using a GPU, your driver needs to be alive and your CUDA setup needs to make sense.
- Python: pin it. You’re not proving a point by letting your global Python mutate under you.
Common failure modes to keep in mind, so you don’t rage-quit:
- You installed a base package but skipped optional extras, then imports fail.
- You installed from “latest” and it changed overnight.
- Data dependencies are missing, and the error message reads like a ransom note.
This tutorial avoids those by being boring on purpose. NVIDIA Earth 2 rewards boring setups.
5. Install uv And Initialize A Clean Project
The whole install flow uses uv, a fast package manager that behaves like it wants your future self to be happy. The vibe is lockfiles and reproducibility, not “pip install and pray.”
Install uv and refresh your environment:
curl -LsSf https://astral.sh/uv/install.sh | sh
source $HOME/.cargo/env
Now create a dedicated project directory and initialize it with Python 3.12:
mkdir fourcastnet3-demo && cd fourcastnet3-demo
uv init --python=3.12
That’s it. You’ve got a clean sandbox. No global site-packages, no mystery dependencies, no archaeological dig through old environments.
6. Install Earth2Studio The Reliable Way
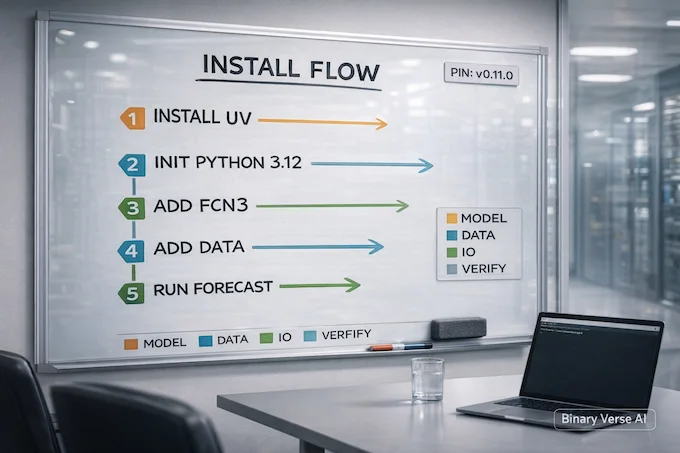
This is the step where most people accidentally make life harder. The fix is simple: install the model extras first, then add the data extras. Also pin to a known tag. You want a tutorial that works tomorrow.
Install Earth2Studio with the FCN3 extras, pinned to version 0.11.0:
uv add "earth2studio[fcn3] @ git+https://github.com/NVIDIA/earth2studio.git@0.11.0"
Then add the data handling extras, also pinned to 0.11.0:
uv add "earth2studio[data] @ git+https://github.com/NVIDIA/earth2studio.git@0.11.0"
If you’ve been Googling NVIDIA Earth 2 install and finding ten different answers, this is the one you can actually trust, because it’s explicit and repeatable.
Also, a small note that’s secretly huge: pinning to a tag keeps your environment stable. “It broke today” is rarely a scientific breakthrough. It’s usually dependency drift.
7. Install FCN3 And Data Dependencies
You already did the important part by installing the extras groups. Conceptually, here’s what you just bought yourself:
- FCN3 extras: the model-specific dependencies needed to load and run FourCastNet 3.
- Data extras: the tools needed to work with GFS data, including dependencies that often show up as eccodes-related pain.
If you want a quick smoke test mindset, it’s this: imports should succeed before you run the full forecast. Missing-import errors are not “mysterious,” they’re just unmet optional dependencies.
This is also where NVIDIA Earth 2 starts to feel like a real platform rather than a pile of scripts. The extras model keeps the core package lean, and the optional groups let you pull in exactly what you need.
8. Your First Forecast Script With FCN3
Now the fun part. Create a file named forecast.py in your project folder and paste this script exactly. It loads the model, fetches GFS data, and runs a 3-day forecast.
import earth2studio.run as run
from earth2studio.models.px import FCN3
from earth2studio.data import GFS
from earth2studio.io import ZarrBackend

# Load the FourCastNet 3 model
print("Loading FourCastNet 3 model...")
package = FCN3.load_default_package()
model = FCN3.load_model(package)

# Create the data source and IO handler
data = GFS()
io = ZarrBackend()

# Run 3-day forecast (12 steps at 6-hour intervals)
print("Running 3-day forecast...")
nsteps = 12
io = run.deterministic(["2024-01-01"], nsteps, model, data, io)

print("\nForecast complete! Output saved in memory.")
print(f"\nAvailable variables: {list(io.root.array_keys())}")
print(f"Data shape example (t2m): {io['t2m'].shape}")
Three knobs you’ll tweak endlessly once this works:
- Start date: change [“2024-01-01”] to whatever you want to launch from.
- Steps and horizon: nsteps = 12 at 6-hour intervals gives you a 3-day forecast.
- Variables: the script prints what’s available, then you can focus on the fields that matter for your use case.
That’s the core loop of NVIDIA Earth 2 in practice: define the run, launch it, inspect what you got, iterate.
9. Run It And Confirm It Worked
Run the script with uv:
uv run python forecast.py
What success looks like is refreshingly boring. You’ll see logs for model loading, then the run, then a “Forecast complete!” message. Runtime depends on hardware, but the qualitative signal is simple: it runs without exploding, and you get a list of variables plus a tensor shape.
Also notice the IO line. ZarrBackend() is created without a path, and the print statement says “saved in memory.” That’s accurate. This first run proves the pipeline, not your storage strategy.
Once this works, you’ve crossed the hardest psychological barrier. You’re not “installing” NVIDIA Earth 2 anymore. You’re using it.
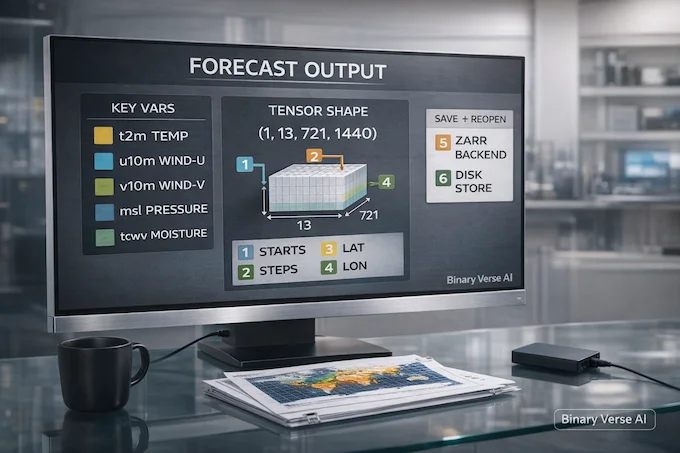
10. Understand The Output Like A Forecaster, Not A Debugger
This is where many ML people accidentally treat weather data like random tensors. Don’t. The variable names encode physical meaning, and that meaning guides what you sanity-check.
From the script’s output list, you’ll typically see:
- t2m: temperature at 2 meters, the surface-level number humans actually feel.
- u10m / v10m: wind components at 10 meters, basically a wind vector split into axes.
- msl: mean sea level pressure, the backbone for synoptic patterns.
- tcwv: total column water vapor, a useful proxy for moisture content.
When you print a shape like (1, 13, 721, 1440), it’s not random either:
- 1 start time in the batch
- 13 time steps, initial plus 12 forecast steps
- 721 x 1440 a global grid at 0.25° resolution
This is why AI weather forecasting feels different from typical vision tasks. You’re predicting fields, not labels. It’s also why Generative AI weather forecasting is such a loaded phrase. The output is structured physical state, and it needs to stay coherent over time.
About persistence: because the backend is Zarr, you can treat it like a chunked dataset store. Point it at disk when you want persistence, and then reopen it later for analysis. Start with the in-memory run. Once you trust it, make it durable.
11. Troubleshooting Guide For The Most Common Errors
When things break, they tend to break in predictable ways. Here’s the short list.
11.1 Optional Dependency Not Installed
Symptom: an import error that mentions something you never asked for.
Cause: you installed a base package but skipped an extras group.
Fix: stick to the two pinned install commands in this guide. They’re designed to include the optional pieces FCN3 and GFS workflows need.
11.2 CUDA Build Failures
Symptom: the install or runtime complains about CUDA, GPU, or compiled components.
Cause: driver or CUDA mismatch, or you’re in an environment where GPU libraries aren’t discoverable.
Fix: confirm your NVIDIA stack is healthy, then rerun in a clean shell. If you’re on WSL2, keep your GPU path consistent.
11.3 Data Download Failures
Symptom: the run starts, then stalls or errors while fetching GFS inputs.
Cause: flaky network, proxy issues, or limited outbound access.
Fix: retry on a stable connection. If you’re behind a proxy, configure your environment so Python can actually download data.
11.4 Works On CPU, Crashes On GPU
Symptom: CPU run works, GPU run fails.
Cause: GPU memory pressure or driver-level instability.
Fix: reduce workload knobs first, fewer steps, smaller experiments. Then work back up. NVIDIA Earth 2 scales up cleanly when the system underneath it is stable.
12. Next Steps After Your First Successful Run
Once you’ve run FCN3, you’ve earned the right to do the fun stuff:
- Run an ensemble forecast to get uncertainty, not just a single best guess.
- Increase the horizon safely by stepping up in small increments and watching memory.
- Compare against other open baselines to build intuition for where FCN3 shines.
- Make the output useful by saving Zarr to disk and building a small analysis loop.
If you’re serious about applying this in a project, the next rabbit hole is Applying AI weather models with NVIDIA Earth 2 in a way that respects your constraints: latency, accuracy, and failure modes.
And if you’re wondering where to click next, people usually start with NVIDIA Earth 2 download links for model weights and then return to the code for iteration. Treat that as a workflow, not a one-time setup.
One last thing. The point of NVIDIA Earth 2 is not to win a benchmark screenshot. It’s to give you an open, production-shaped path to weather intelligence. You now have the local loop running. That’s the hard part.
If this guide saved you time, do yourself a favor and keep it close: bookmark it, paste it into your lab notes, and share it with the next person who says “I want to try NVIDIA Earth 2 but I don’t know where to start.” Then go build something useful with it.
1) What is Earth 2?
Earth 2 is NVIDIA’s open model and tooling stack for weather and climate AI, spanning forecasting, nowcasting, downscaling, and the workflows around them. In practice, it’s a way to run modern AI weather models without needing a national-supercomputer budget, while keeping the stack flexible enough for researchers and builders.
2) What is the Earth 2 cloud platform?
“Earth 2” gets used in two ways. One is the bigger platform idea (models, tools, visualization, and deployment concepts). The other is the open stack you can run yourself. In this guide, the focus is the local route: Earth2Studio running on your machine, pulling public model assets and tooling from places like NVIDIA Earth 2 GitHub, plus download-style access through common hosting.
3) What are the capabilities of Earth 2?
Four core capabilities show up repeatedly:
Medium-range global forecasts (multi-day outlooks at global scale)
Short-range storm nowcasting (minutes to hours, hazard-focused)
Downscaling (turn coarse fields into higher-resolution regional outputs)
End-to-end pipeline direction (including data assimilation as it becomes available)
That mix is why AI weather forecasting work is shifting from “demo” to “workflow.”
4) Does ChatGPT use Nvidia?
It can. ChatGPT can run on different hardware depending on how it’s deployed, and many AI workloads in general use NVIDIA GPUs. That said, this guide isn’t about ChatGPT’s infrastructure. It’s about running NVIDIA Earth 2 tools locally so you can build and test your own forecasting workflows.
5) What is NVIDIA Earth 2 used for?
NVIDIA Earth 2 is used to build faster AI-based forecasting workflows for research and industry, everything from global prediction to local hazard nowcasts and downscaled fields. If you care about “good enough forecasts, fast, on hardware you control,” it’s a practical way to get there, especially when you pair Earth2Studio with a model like FCN3.